There’s just something so mesmerizing about sugar work. The shine, the sparkle, the glass-like gleam. Even as first year pastry students at Le Cordon Bleu, it was the course subject that excited and terrified us in equal measure.
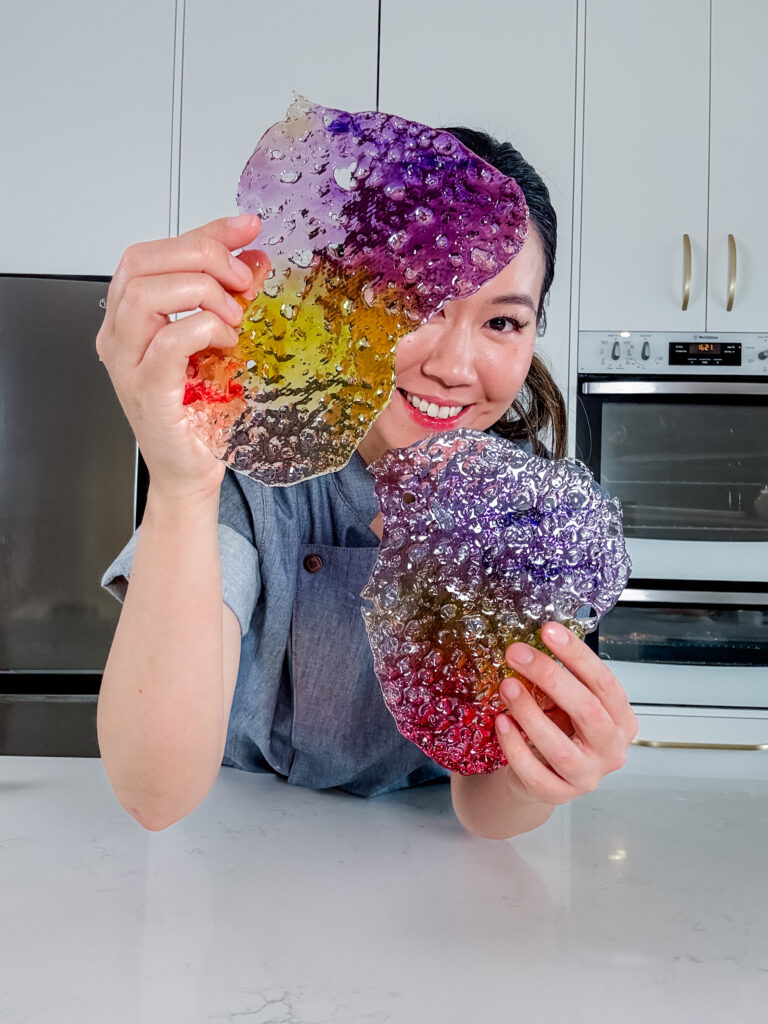
In between sugar pulling, blowing, moulding isomalt centrepieces and ribbons, one particular sugar decoration stood out to me. It was these bubble-textured shards that were so beautiful, mesmerising yet incredibly easy to make, so much so that it seemed almost…unfair?
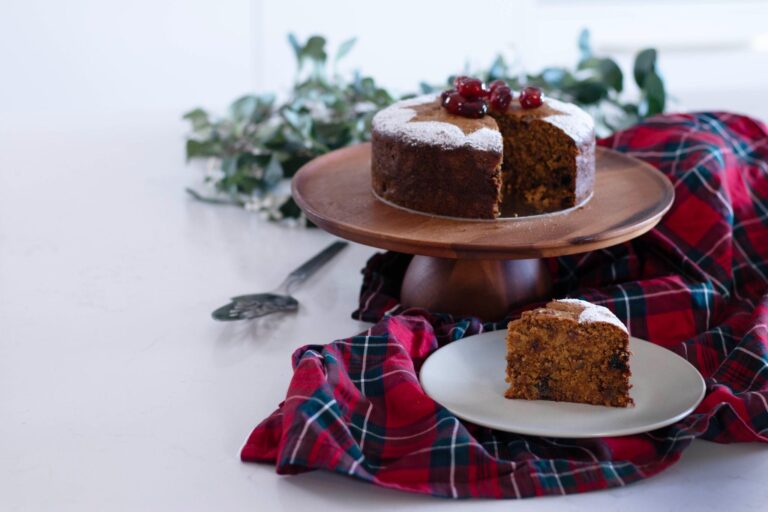
So enamored was I, that I chose to include this decoration in my final cake assessment (which proudly awarded me the DUX first-in-class recognition.. Say whuuuuutttt!).
When I released this video Reel last week on Instagram, I had no idea it would be of interest to so many. The post hit 50,000 views overnight with hundreds of you requesting the recipe. Well, here it is! The full step-by-step recipe on how to make these gorgeous bubble shards.
Get ready though to scratch your heads and ask…”Is that it?” as the recipe is incredibly simple and brief. So easy… it almost seems like cheating.
Preheat the oven to 170 degrees Celsius or 340 degrees Fahrenheit. If using fan-forced, reduce the temperature to 160 Celsius or 320 Fahrenheit.
Line the baking tray with baking parchment or silicone mat. Ensure it is laying flush/flat to the entire surface of the tray. Any dips or folds will result in “pooling” of the glucose and cause your shard to be uneven.
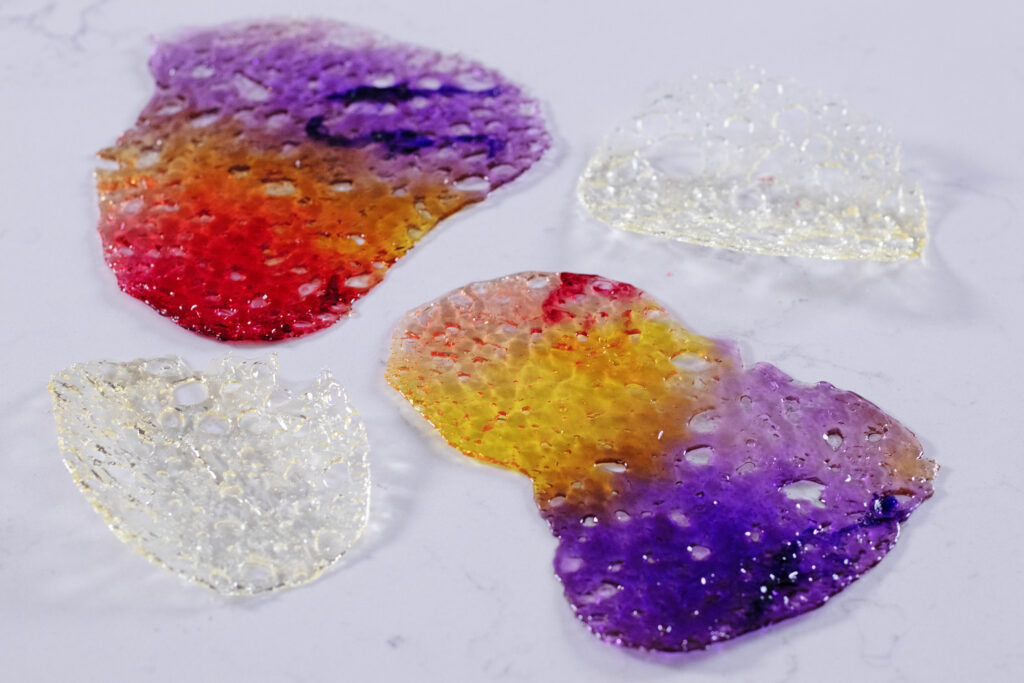
Using the spatula or teaspoon, apply small to large dollops of glucose onto the lined baking tray. Smaller dollops will result in smaller shards and large dollops will result in larger shards. Try to spread the glucose out and leave large spaces in between each dollop,as the shards will spread immensely when cooking in the oven.
Apply drops of gel food colour to your glucose and loosely mix them into the spread glucose. Utilising various colours on different parts of the glucose will give you a multi-coloured effect. You do not need to completely mix the colours in as the colours will further seep into the glucose during the cooking process.
Place the tray of glucose into the oven to bake for 15-20 minutes. You will observe that the glucose will bubble actively during the cooking process. When the bubbling slows (it will look like slow-motion bubbling lava), it is close to being ready. Give it another 2-3 minutes and then remove from the oven, ensuring that you DO NOT TOUCH the glucose at this stage – it is extremely, dangerously hot and will result in serious burns.
Leave the hot glucose to cool completely at room temperature for at least 20 minutes. When cooled, the shards will be completely hard and set, and you’ll be able to peel it off the lining.
Store in air-tight containers until ready to be applied onto your desserts/cakes.
Important Notes
Use an oven thermometer as there is great discrepancies in domestic ovens
If your shards do not set hard after baking, it could be that it wasn’t cooked long enough. You can increase the oven temperature by 10 degrees and re-bake it in the oven again for another 6-10 minutes.
You can omit the colours if you’d like clear shards
It is possible to make curved shards by quickly setting the silicon mat/baking parchment in curved forms (using bowls or rolling pins) as soon as it comes out of the oven. The glucose sets quickly, so you’ll have to do this within the first minute of taking them out of the oven.
Overbaking can result in caramelisation of uncoloured shards. This is less obvious in coloured shards.
If you accidentally burn yourself with the hot sugar, administer first aid – place the burn under cold running water for 20 minutes and get assessed by a medical professional as soon as possible.
Shards can hold up in the fridge for a short amount of time. Avoid having them in the fridge for more than 8 hours as it may absorb moisture and begin to dissolve.
If you’ve never tried making sugar decorations before, this is a great one to get started with. It is truly such a beautiful edible decoration. If you try making this, tag me on Instagram @sugarsugarcakeschool as I’d love to see how you use these decorations in your creations!
✅ Learn what makes a cake video or photo share-worthy. ✅ Discover the best way to grow your audience. ✅ Boost your chances of going viral with simple, creative tips!
Don’t miss out! Download now and start creating baking content that gets noticed!
Dreaming about turning your cake passion into a thriving business?
✅ You love experimenting with new cake designs. ✅ Friends and family rave about your cakes. ✅ You’re ready to turn your passion into profit. ✅ You’re excited about the idea of running your own business!
If these sound like you, download our free guide and take the first step toward making your cake business dream a reality!