CHOCOLATE GANACHE RECIPE CALCULATOR
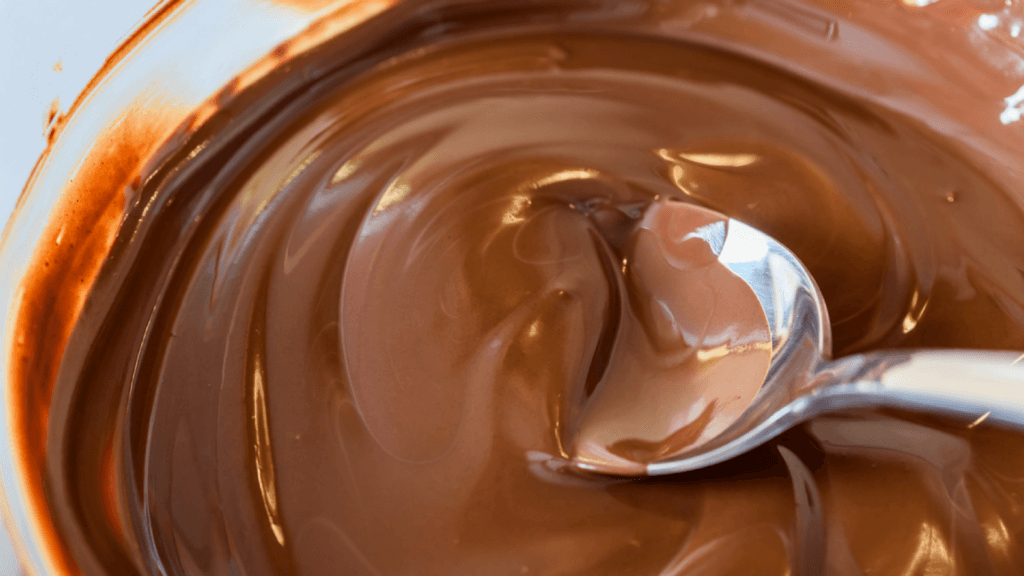
Oo lala…Is there anything better than a mouthful of luscious chocolate ganache? Ask me any day, Ganache is my go-to medium for crumb coating & covering all my fondant cakes. Why? Apart from it’s delectable mouth feel & flavour, I find a ganache-coated cake to be smoother, sturdier & more temperature-robust compared to buttercream- covered cakes. On top of that, it’s easier to maintain a “sharp edge” on your cakes (if covering in fondant) with a ganache undercoat.
Whether you choose to fill your cakes with ganache as well OR fill with buttercream and then crumb coat in ganache – the choice is yours! I do both depending on the type of cake I’m making & the season/climate. Personally, I often fill & cover carved/odd- shaped cakes with ganache and on the flipside; prefer to fill with buttercream and cover in ganache when it comes to birthday & wedding cakes. But feel free to do what suits your stride!
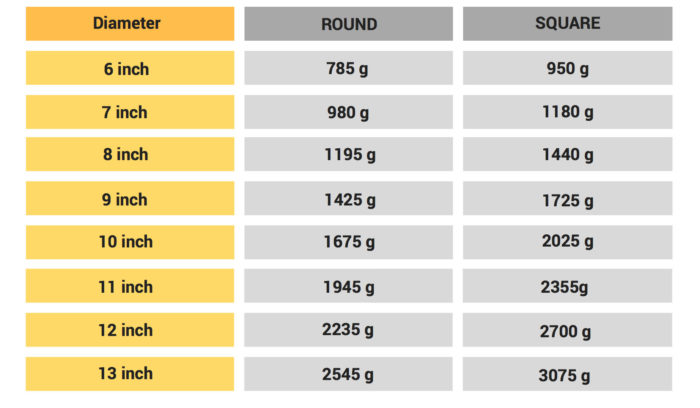
To utilise this ganache recipe guide, firstly use the ganache estimate table below to work out the weight of ganache you require for your project. Secondly, insert this figure into the recipe calculator below which will provide you with with the ingredient ratios to use. Follow the method of your choice & voila! Welcome to Ganache Heaven!
*Chart calculations below are for cakes that are 4 inches high, with 2 layers of filling within
BAIN MARIE METHOD
1. Fill a saucepan/pot halfway with water and place over heat till it comes to a simmer.
2. Place chopped up chocolate (or you may us chocolate buttons/chips) into a heatproof bowl. Pour the measured amount of cream into the bowl as well.
3. Sit the heatproof bowl of chocolate & cream on top of the pot/saucepan of simmering water, ensuring that the water doesn’t touch the base of the bowl.
4. Using a whisk, stir constantly (& gently) until the chocolate melts & emulsifies with the cream. Remember to scrape around the sides & bottom of the bowl to ensure that none of the chocolate “burns” in these heat-spots.
5. Leave the chocolate at room temperature to sit for a few hours. The ganache is ready to be used to fill & cover your cakes when it is a “peanut butter” consistency.
MICROWAVE METHOD
1. Place the chopped up chocolate (or you may us chocolate buttons/chips) into a heatproof bowl. Pour the measured amount of cream into the bowl as well.
2. Microwave this bowl of chocolate & cream for 45 seconds.
3. Remove from the microwave and mix with a whisk.
4. Microwave the bowl of chocolate & cream for 30 seconds.
5. Remove from the microwave & whisk together.
6. Keep repeating this process of heating (30 second blasts) and mixing until the chocolate melts & emulsifies with the cream.
7. Leave the chocolate at room temperature to sit for a few hours. The ganache is ready to be used to fill & cover your cakes when it is a “peanut butter” consistency.
KITCHEN NOTES:
- If your ganache sets too hard, you can soften this by microwaving it for 15 second increments and mixing it in between until it returns to a spreadable “peanut butter” consistency
If your ganache “splits” at any point of time, you can remedy this by heating up a 1/4 cup of cream (till very very hot) and whisking this through the split ganache - Should you have any leftover ganache, you may place this into ziplock bags, flatten and freeze for up to 3 months (remember to date & label it). To reuse, thaw in the fridge overnight, break it up into pieces and microwave in a heatproof bowl for 20 second increments (mixing in between) until it comes to a spreadable consistency
- If you are in a hurry, you can speeden up the amount of time it takes your freshly made ganache to firm up to a “peanut butter” consistency but – placing the bowl of ganache in the fridge for 10-15 second increments and mixing it well in between
- The duration of time ganache can sit at room temperature will vary depending on your local climate. Please consult your local health/food safety authorities for shelf stability indications
Ganache can be stored in the fridge (4 deg celcius & below) for up to 3 days and used. Should you wish to store it longer than that, follow the freezer storage instructions above.