Another Monday, another blog post! I hope my efforts to drive away some of your “Monday blues” with these cake blogs are working ;P
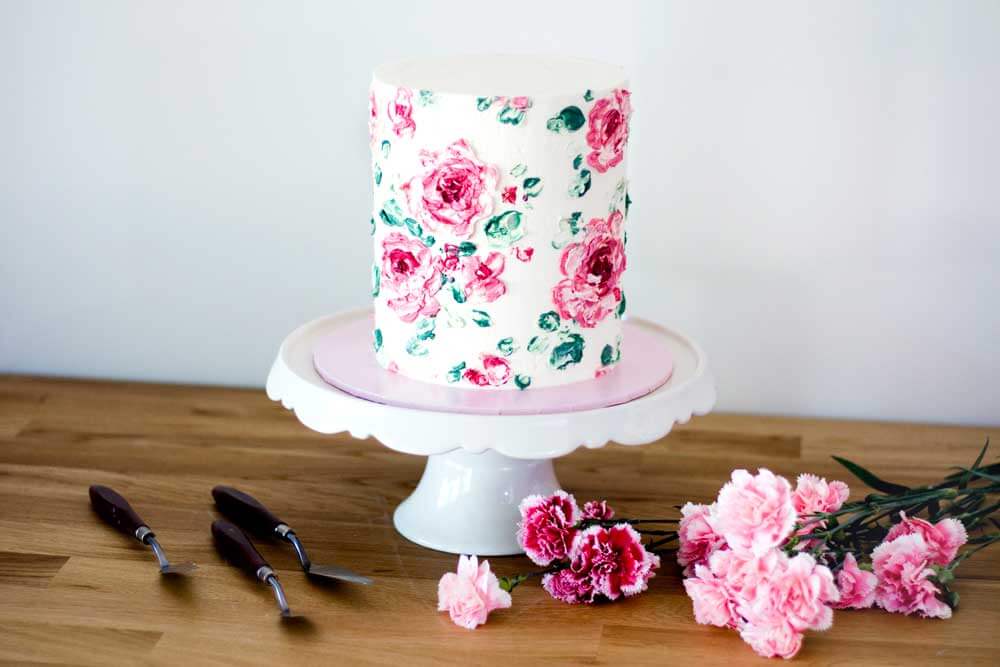
I made this cake for a sweet friend waaaaay back at the start of the year. Baby raising, business running and so many things in between and I can finally, FINALLY share this cake with you guys.
In the last two weeks I shared on the topic of ‘Keys to Creativity’ and in case you missed it, you can read up on Part 1 and Part 2. So I thought this week I’ll share a bit about the design process of this cake, from idea to conception, to further elaborate on what we’ve been talking about on the subject of creativity & design.
1. Inspiration
So I was flicking through my Instagram feed one casual Sunday evening and chanced upon a gorgeous oil painting of a dude’s face (in case you’re curious, the artist’s name is Joshua Miels and he is a ridiculously talented artist, as for the dude in the painting.. let’s just call him Bob).
The first thought that came into my mind was, “That oil painting of Bob looks so similar to the consistency of my Buttercream” (which I had coincidentally snacked on the day before).
Which got the wheels turning.. Could I replicate this in cake? How would I do it? What could I paint?
2. Recording & Idea Building
Recording is a MAJOR part of the design process. I’ll bet we get a whole bunch of thoughts & good ideas on a frequent basis but don’t steward those ideas well enough; thus surrendering them to the clutches of busyness and agendas which ultimately result in their demise.
So the next thing I did was to jot down “Oil Painted Cake using Buttercream” and sketch out a few design options. Some where of swooshy patterns, lines and smears but I finally settled on a floral design. Flowers are one of my favourite things to paint and I figured was a versatile design for many occasions, so overall it seemed to be a winner.
3. Experimentation
Every good idea needs to be experimented with and put through the paces of trial and error. So I whipped up a big batch of my fav Swiss Meringue Buttercream recipe, flicked on the crooning tones of Coldplay in the background and experimented in the kitchen for a couple of hours. I already knew the brushstrokes for painting roses from my previous painting education in my late teens, so what I needed to do was translate this into “buttercream painted” brushstrokes. I tweaked, fiddled and tested my ideas until my hands were finally creating what my brain was telling them to.
4. Creation
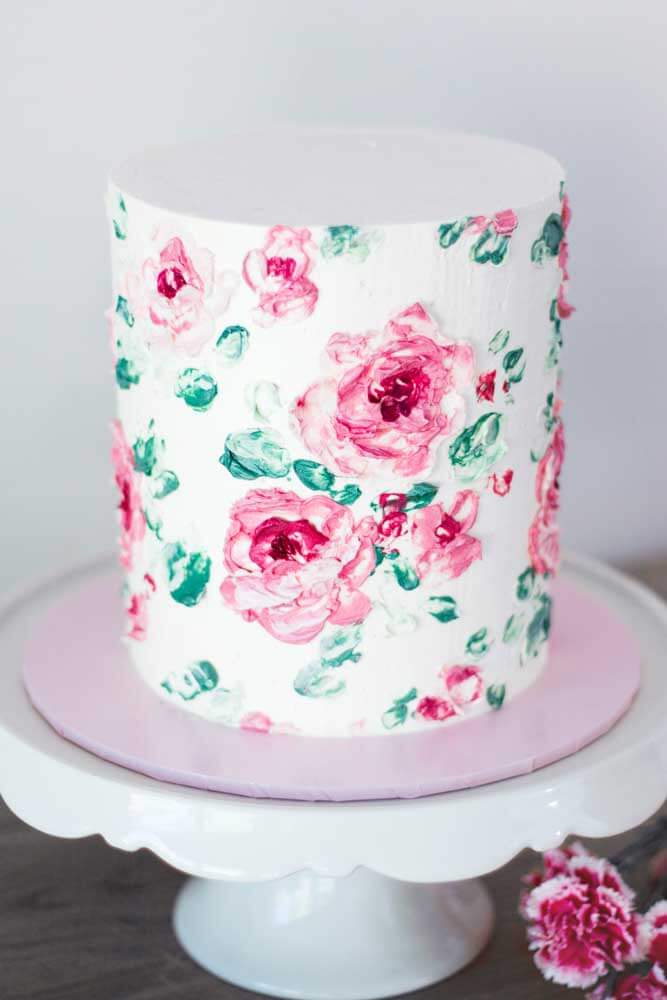
It was now time to create my pièce de résistance, my Painted Buttercream Rose Cake.! I started by baking my ultimate Vanilla Cake Recipe, filled it, covered it, then got to work on painting my buttercream roses all over to create a stunning floral foliage. At the same time, I decided to film and document the steps & techniques of creating this, as I knew there would be so many of you guys out there curious to know how I created this design.
So here it is! If you’re wanting to learn how I painted these buttercream flowers, you can check out the full step-by-step tutorial right HERE. I can’t wait for you sweeties to get stuck into this one! It’s so gooood!
I hope you enjoyed walking with me through the design process, and I’d love to invite you onto your very own creation process of learning this versatile skill via the online tutorial. I’ll see you on the other side!
As always, hit me up with your questions! I love walking out this cake journey with you <3
